I absolutely adore this Beet Hummus Recipe because it blends the earthy sweetness of roasted beets with the creamy richness of chickpeas and tahini in such a vibrant and inviting way. I love how the stunning pink hue of the hummus instantly brightens up any snack table, making it as beautiful as it is delicious. It’s one of those dishes I reach for when I want something healthy, colorful, and bursting with flavor, whether for a quick bite or entertaining friends.
Why You’ll Love This Beet Hummus Recipe
What really excites me about this Beet Hummus Recipe is its unique flavor profile: the natural sweetness from the roasted beets perfectly balances the nuttiness of tahini while the garlic and lime add a little zing. Every time I dig into this dip, I’m reminded how such simple ingredients can come together to create something so fresh and satisfying. It’s like a party for your taste buds without being overpowering.
I also appreciate how incredibly easy and quick it is to prepare. With just a handful of staple ingredients and less than 10 minutes of hands-on time, I can whip up a batch that’s ready to impress guests or satisfy my afternoon snack cravings. I love serving it at casual family dinners, vibrant get-togethers, or even just alongside my weeknight veggies. It stands out because it’s not just a hummus; it’s a flavorful, colorful twist that elevates any table.
Ingredients You’ll Need
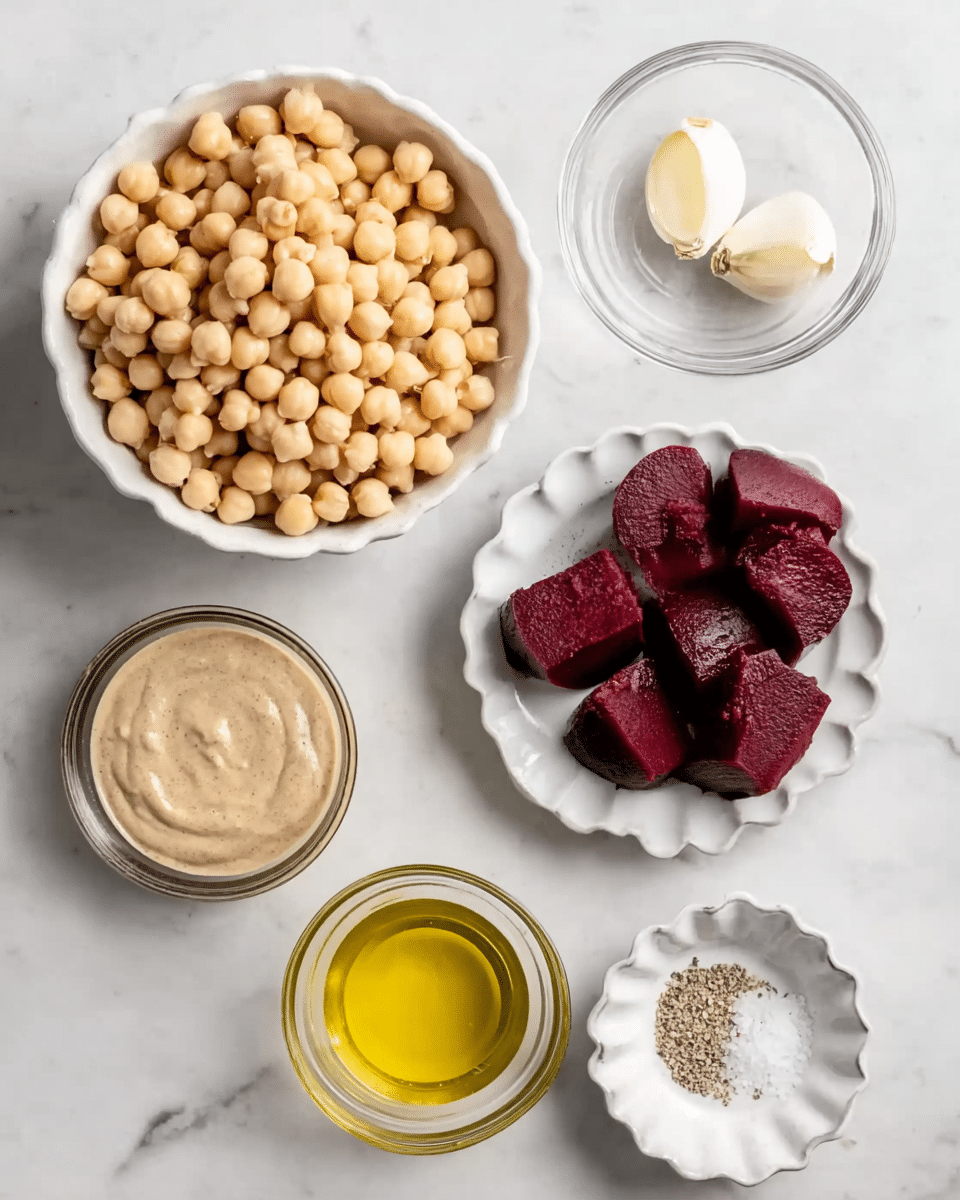
The ingredients for this Beet Hummus Recipe are wonderfully straightforward but each plays a crucial role in building the perfect texture, flavor, and that gorgeous color. I always find that using fresh, high-quality produce really makes a difference here.
- 1 medium roasted beet: Roasting brings out the beet’s natural sweetness and gives the hummus its vibrant pink color.
- 2 cups cooked and drained chickpeas (330g): These provide creaminess and protein, forming the base of the hummus.
- 1 tablespoon lime juice (15mL): This brightens the dip with a subtle acidity that balances the sweetness of beets.
- 3 tablespoons olive oil (45mL): Adds richness and silky texture to the hummus.
- 2 tablespoons tahini (30g): This sesame paste brings nuttiness and depth of flavor.
- 1/2 teaspoon sea salt (3g): Enhances all the natural flavors.
- 1/4 teaspoon ground black pepper (0.5g): Adds a gentle warmth.
- 2 cloves garlic: Provides a hint of pungency to balance the sweetness.
Directions
Step 1: Start by chopping the medium roasted beet into smaller pieces to help your food processor blend it smoothly and evenly.
Step 2: Add the chopped beet and cooked, drained chickpeas into your food processor. Pulse for about 15 seconds until they’re just slightly combined but not fully pureed yet. This gives you better control over the final texture.
Step 3: Next, add the lime juice, olive oil, tahini, sea salt, black pepper, and garlic cloves to the mixture. Blend everything together on high speed for 30 seconds to a full minute, or longer if needed, until the hummus is completely smooth and creamy.
Step 4: Taste the hummus and adjust seasoning if necessary—sometimes a little extra lime juice or salt can really brighten it up. Then scoop it out into your serving dish, ready to enjoy!
Servings and Timing
This Beet Hummus Recipe makes approximately 6 generous servings, perfect for sharing at a small gathering or enjoying as snacks throughout the week. The prep takes just about 5 minutes, and the blending itself is around 5 minutes more, so the total time from start to finish is a quick 10 minutes. Since you’re using roasted beets, I count that as prep done ahead, but once your beets are ready, this dip comes together faster than you might expect.
How to Serve This Beet Hummus Recipe
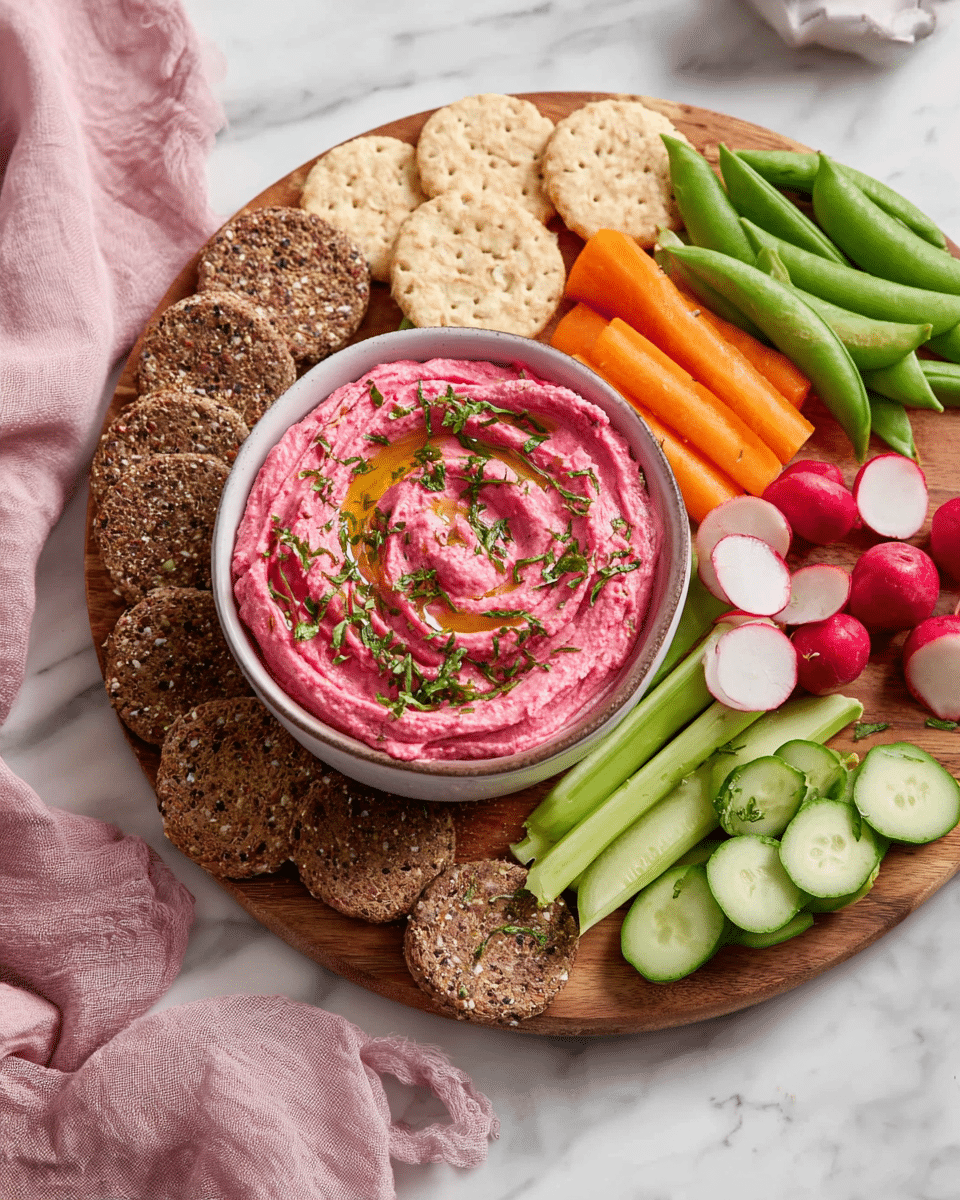
When I serve this Beet Hummus Recipe, I love to present it chilled or at room temperature, giving the flavors a chance to meld beautifully. I often drizzle a bit more olive oil on top just before serving, then sprinkle with a few toasted pine nuts or fresh parsley for an extra pop of texture and color. It’s such a crowd-pleaser when paired with warm pita bread, crunchy vegetable sticks like carrots and cucumber, or even alongside some crispy pita chips.
For a little more elegance, I sometimes spread it out on a large platter and arrange slices of fresh radish, cherry tomatoes, and kalamata olives around it, making it a colorful appetizer that everyone gravitates toward. In terms of drinks, a crisp white wine or a light, citrusy cocktail complements the earthiness and brightness of the beet hummus really well. For something non-alcoholic, I’d go with sparkling water with a squeeze of lime or a refreshing iced herbal tea.
This recipe shines at many occasions—from casual weeknight dinners and potlucks to holiday spreads and celebratory parties. It’s versatile and approachable, so feel free to experiment with how you serve and enjoy it. For portion sizes, I find that about a quarter cup per person makes a perfect side dip without overwhelming your plate.
Variations
One of the joys of this Beet Hummus Recipe is how flexible it is. If you want to shake it up, you can swap out the lime juice for lemon juice for a slightly different citrus note. I’ve also tried using roasted red peppers instead of beets for a smoky, sweet variation that’s equally stunning.
If you need a gluten-free or vegan option, rest assured that this recipe already fits the bill perfectly. For a little extra creaminess, sometimes I add a spoonful of Greek yogurt if I’m not strictly vegan—it gives the dip an even silkier mouthfeel. For a bit more heat, adding a pinch of cayenne pepper or some smoked paprika works wonders.
As for cooking methods, while I love roasting the beets to bring out their natural sweetness, you could boil or steam them if you prefer a quicker method, though the flavor won’t be quite as concentrated. You can even use pre-cooked beet slices from your local store for an ultra-easy option to save time.
Storage and Reheating
Storing Leftovers
I store leftover beet hummus in an airtight container in the refrigerator to keep it fresh for up to a week. I find that glass containers with tight-fitting lids work best to maintain freshness and prevent any other flavors from mixing in. Always give it a good stir before serving again to reincorporate any oils that may have separated.
Freezing
I generally do not recommend freezing this Beet Hummus Recipe because the texture and color can be affected by freezing and thawing. The beets may release extra moisture, making the hummus more watery upon thawing. If you must freeze it, use a freezer-safe airtight container and consume within one month, but be prepared to re-blend it after thawing to refresh the texture.
Reheating
This hummus is best enjoyed cold or at room temperature rather than reheated. If you do want to warm it slightly, I suggest taking it out of the fridge about 15-20 minutes before serving to let it come closer to room temperature. Avoid microwaving, as it can change the texture and mute the fresh flavors. A gentle stir before serving is all it really needs to taste its best again.
FAQs
Can I use raw beets instead of roasted beets in this Beet Hummus Recipe?
While you can use raw beets, I highly recommend roasting them first because it softens the beets and brings out their natural sweetness, which really enhances the flavor of the hummus. Raw beets will give you a more earthy and slightly bitter taste, and the texture might be grainier.
Is this beet hummus recipe vegan and gluten-free?
Yes! This recipe is naturally vegan and gluten-free, making it a fantastic choice for people with those dietary preferences. Just ensure your tahini and other ingredients have no added gluten-containing additives if you’re particularly sensitive.
How long will the Beet Hummus Recipe keep in the fridge?
Stored properly in an airtight container, this beet hummus will stay fresh for up to one week. Just check for any off smells or changes in texture before eating if it has been stored for close to that length of time.
Can I make this recipe without a food processor?
It’s definitely possible but a bit more labor-intensive. You’d want to finely grate or mash the roasted beets and mashed chickpeas by hand, then whisk in all remaining ingredients until smooth. However, a food processor ensures the best creamy texture quickly and easily.
What’s the best way to add more zest or spice to this hummus?
I love adding a pinch of smoked paprika, cayenne pepper, or even a bit of jalapeño for heat. Another great way to bring in extra zest is to increase the garlic or lime juice slightly, depending on your taste preferences.
Conclusion
I’m so excited for you to try this Beet Hummus Recipe because it’s one of those dishes that feels special yet is incredibly simple to make. It’s colorful, flavorful, and a wonderful way to brighten up your snack or meal routine. Trust me, once you make it, this creamy, vibrant hummus will become a staple you’ll want to share over and over again. Enjoy every delicious bite!
Print
Beet Hummus Recipe
This vibrant Beet Hummus combines roasted beets with creamy chickpeas and tahini for a flavorful, colorful dip. Easy to prepare in just 10 minutes, it offers a nutritious snack or appetizer that’s perfect for sharing. The roasted beets add a subtle sweetness and beautiful pink hue, making this hummus both delicious and visually appealing.
- Total Time: 10 minutes
- Yield: 6 servings
Ingredients
Beet Hummus Ingredients
- 1 medium roasted beet, chopped
- 2 cups cooked and drained chickpeas (330g)
- 1 tablespoon lime juice (15mL)
- 3 tablespoons olive oil (45mL)
- 2 tablespoons tahini (30g)
- 1/2 teaspoon sea salt (3g)
- 1/4 teaspoon ground black pepper (0.5g)
- 2 cloves garlic
Instructions
- Prepare Ingredients: Ensure your beet is roasted and chopped, and the chickpeas are cooked and drained before beginning the recipe.
- Blend Base: Place the roasted beet and chickpeas in a food processor and blend for about 15 seconds until they are roughly combined.
- Add Remaining Ingredients: Add lime juice, olive oil, tahini, sea salt, ground black pepper, and garlic cloves to the mixture.
- Blend Until Smooth: Process the mixture for 30 seconds to 1 minute, or longer if needed, until the hummus is smooth and creamy.
- Taste and Adjust: Sample the hummus and adjust seasoning to your preference by adding more salt, lime juice, or garlic if desired.
- Serve: Transfer to a serving bowl and enjoy with pita, vegetables, or as a spread.
Notes
- Store beet hummus covered in a bowl or airtight container in the refrigerator for up to one week.
- Do not freeze this hummus as it may affect texture and flavor.
- For extra creaminess, you can add a tablespoon of water or olive oil while blending if needed.
- This recipe is naturally gluten free and vegetarian.
- Prep Time: 5 minutes
- Cook Time: 5 minutes
- Category: Dip
- Method: Blending
- Cuisine: Mediterranean
- Diet: Gluten Free


