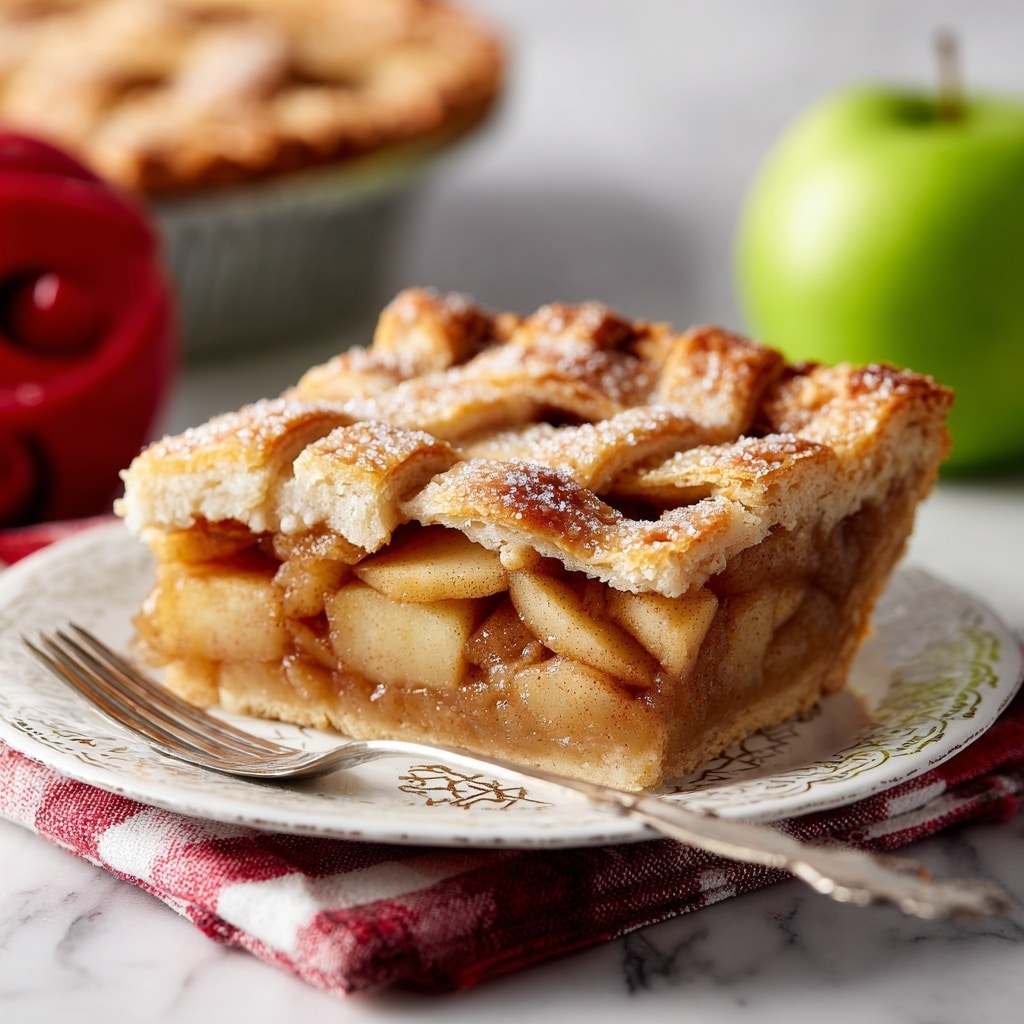
I absolutely adore this Apple Slab Pie Recipe because it captures everything I love about a classic apple pie and turns it into a big, shareable treat that’s perfect for gatherings. The combination of tart Granny Smith and sweet Honeycrisp apples gives that perfect balance of flavor, and the buttery crust is just something I dream of. If you’ve ever wanted to serve a homemade dessert that’s both comforting and impressive but easy enough to make, this recipe is exactly what you need.
Why You’ll Love This Apple Slab Pie Recipe
From the moment I first baked this pie, I knew it was something special. The flavor profile is just spot-on, with the tartness of Granny Smith apples playing beautifully against the natural sweetness of Honeycrisp, all wrapped up in warm notes of cinnamon and nutmeg. The texture is delightful too—the apples are tender but still hold their shape perfectly after cooking, giving you bites that aren’t mushy but just juicy enough. That’s a balance I always chase in apple pies, and this recipe nails it.
What really makes this Apple Slab Pie Recipe stand out to me is how straightforward it is to prepare despite the impressive result. I love the step of cooking the filling on the stove first; it’s a game changer for ensuring the filling is perfectly soft and flavorful while keeping the pie crust from getting soggy. Plus, the slab format means you can serve a crowd easily—no more wrestling with delicate pie slices! It’s the perfect dessert for holidays, potlucks, or whenever you want to whip up a cozy dessert that everyone will ask for again.
Ingredients You’ll Need
Each ingredient in this recipe plays a crucial role in bringing the pie to life, from the crunchy, flaky crust to the luscious apple filling. The simplicity of the ingredients means you’re probably already familiar with them, and their quality really shines through in this classic dessert.
- All-purpose flour: Essential for creating that tender yet sturdy crust that holds all the filling perfectly.
- Unsalted butter: Cold and cubed, butter adds incredible richness and flakiness to the pie crust.
- Granny Smith apples: These tart apples provide a crisp contrast to the sweetness, keeping the pie balanced.
- Honeycrisp apples: The sweet and juicy variety rounds out the filling with extra flavor and moisture.
- Lemon juice: Keeps the apple slices from browning and adds a subtle zing to brighten the flavors.
- Brown sugar and white sugar: Together they add depth and sweetness to the filling.
- Cinnamon and nutmeg: Classic warming spices that give the pie its signature cozy aroma.
- Vanilla extract: Adds a gentle sweet note that enhances all the other flavors.
- Egg: Used for brushing on the crust to achieve that gorgeous golden-brown finish.
- Coarse sugar (optional): Adds a delightful crunch and sparkle on top of the crust.
Directions
Step 1: Start by making the crust. In a large bowl, combine the flour and salt, then scatter the cold butter cubes on top. Use a pastry cutter or fork to cut the butter into the flour until the butter pieces are about the size of small peas. This step is key to creating a flaky crust.
Step 2: Slowly add 4 tablespoons of very cold water, folding the mixture gently with a rubber spatula. Check by pinching the dough; if it holds, you’re ready. If not, add another tablespoon of water and fold until the dough just comes together without being sticky.
Step 3: Turn the dough out onto parchment paper and gently shape into a ball. Divide it in half and flatten each into discs or rectangles. Wrap tightly in plastic wrap and refrigerate for at least an hour, or up to 2 days. This rest time lets the dough firm up for easier rolling later.
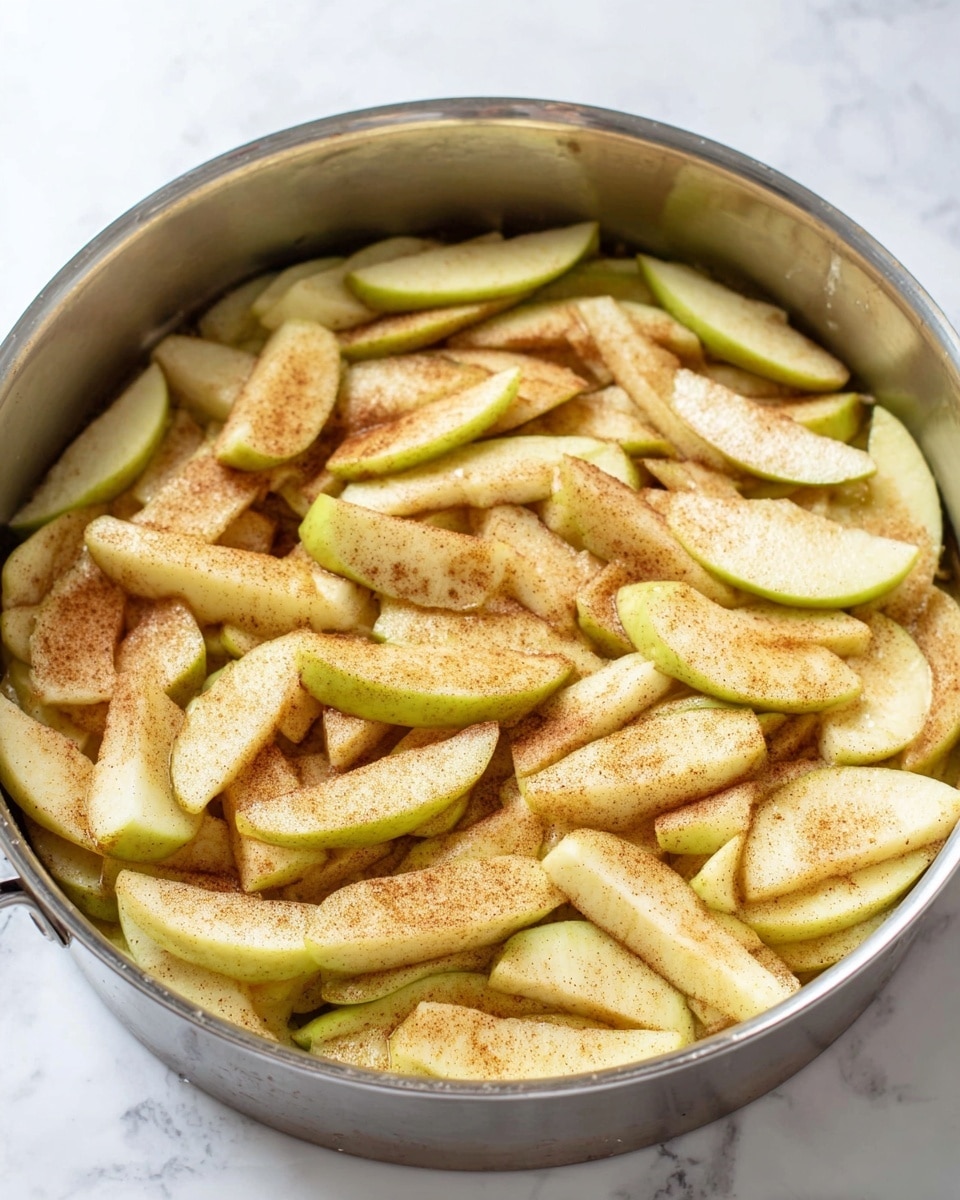
Step 4: Prepare the apple filling by peeling, coring, and slicing your Granny Smith and Honeycrisp apples evenly to about 1/8-inch thick. Toss them right away in lemon juice to keep them fresh and prevent browning.
Step 5: In the same large bowl, gently toss the apple slices with the brown sugar, white sugar, flour, salt, cinnamon, and nutmeg to coat all the apples evenly. Transfer this mixture to a large skillet.
Step 6: Cover the skillet and cook the apples over medium heat for about 20 minutes, stirring occasionally. You’re aiming for apples that are tender when pierced with a fork but still holding their shape, since they won’t cook down further in the oven. Stir in vanilla extract once off heat.
Step 7: Spread the cooked apple filling evenly onto a sheet pan and refrigerate until completely cooled. This can take a couple of hours, or faster if placed in the freezer briefly (just don’t let it freeze solid).
Step 8: When ready, roll out one piece of chilled dough on parchment paper to fit your 10×15-inch pan, leaving a bit extra for shaping. Use the parchment paper to lift and place the crust into the pan. Shape the edges as desired.
Step 9: Add the cooled apple filling evenly on top of the crust. Roll out the remaining dough and cover the filling. I love doing a lattice top for a classic look, but a fully covered top with steam vents works well too. Crimp or fold the edges to seal.
Step 10: Brush the entire crust with beaten egg and sprinkle with coarse sugar if you want that irresistible sparkle. Chill the assembled pie in the fridge or freezer for 20-30 minutes to firm up before baking.
Step 11: Preheat your oven to 425°F and place a large baking sheet inside to get hot. When ready, set the pie on the hot baking sheet and bake for 15 minutes until the crust starts to brown.
Step 12: Lower the oven temperature to 350°F and bake for another 25-35 minutes until the crust is golden and you see the juices bubbling through. If the crust darkens too quickly, tent with foil and make sure steam vents remain open.
Step 13: Remove the pie and let it cool on a wire rack for 1-2 hours to allow the filling to thicken and set. Cutting too soon might cause juices to run, so patience here will reward you with perfect slices.
Step 14: Slice into roughly 18 pieces and enjoy your delicious Apple Slab Pie.
Servings and Timing
This Apple Slab Pie Recipe yields about 18 generous slices, making it ideal for feeding a large family or group of friends. You’ll spend about 1 hour and 30 minutes preparing the dough and filling, plus an important chilling or cooling time of roughly 2 hours and 20 minutes to get everything firm and ready. The baking itself takes about 40 minutes at two temperatures for that perfect golden crust and perfectly cooked filling. Altogether, plan on around 4 hours and 30 minutes from start to finish, mostly hands-off during resting phases.
How to Serve This Apple Slab Pie Recipe
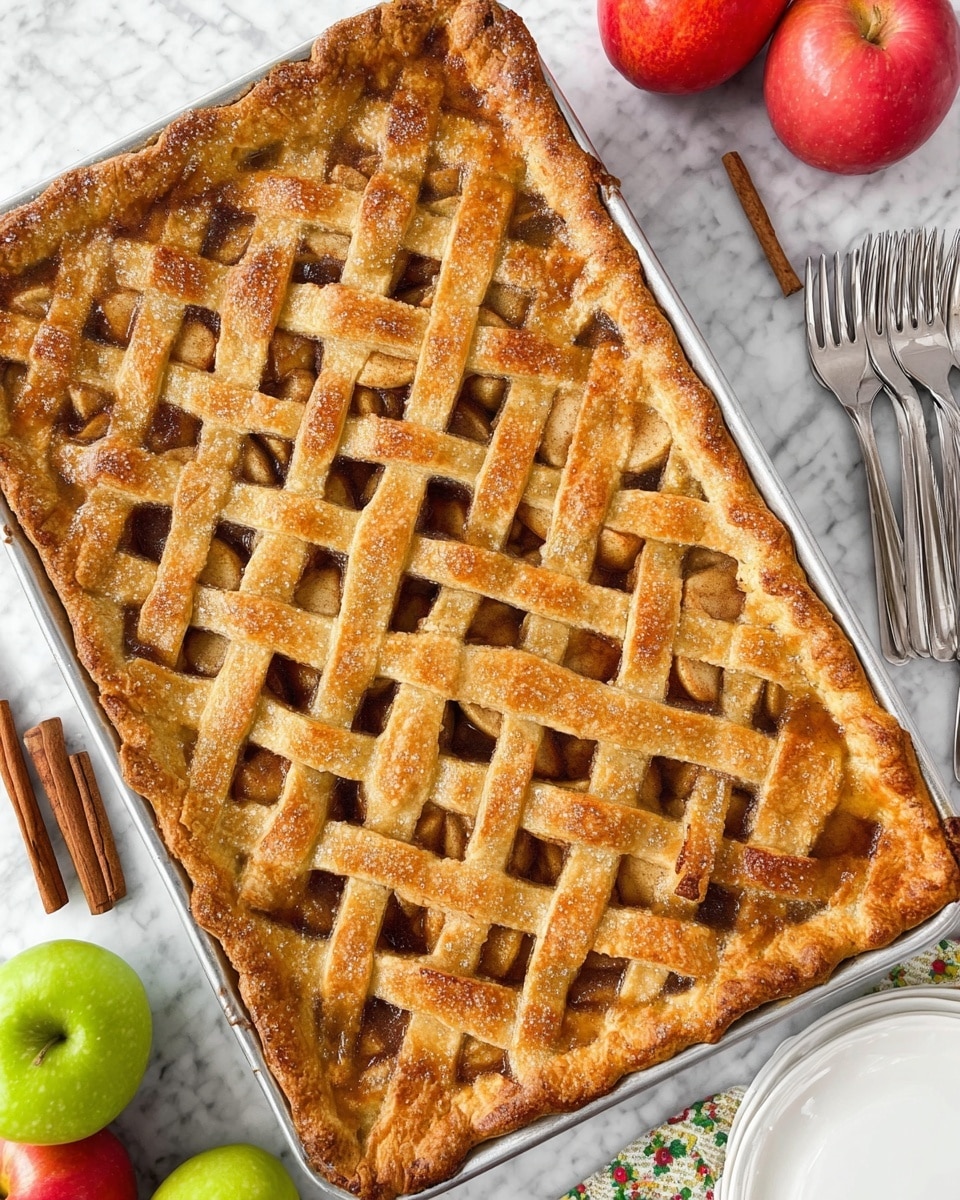
When I serve this Apple Slab Pie, I love to keep it warm or at room temperature, which really lets the flavors shine without the crust getting soggy. Leftover slices are fantastic chilled too, especially if someone prefers a cool texture. You can garnish each slice with a dollop of freshly whipped cream or a scoop of classic vanilla ice cream—both bring out the warm spices in the pie beautifully.
For presentation, I usually plate a single square slice on a white dessert plate, add a sprinkle of cinnamon on top of the whipped cream, and a small sprig of fresh mint. It’s simple but so charming for a family dinner or holiday celebration. If I’m serving at a party, the slab format makes it super easy for guests to grab and go, which is always a crowd-pleaser.
As for drinks, I’m a big fan of pairing this pie with a hot cup of coffee or spiced chai tea in the cooler months. If you want something festive, a glass of late-harvest Riesling or a sparkling apple cider complements the pie’s sweetness and spice perfectly. This dessert is versatile enough to suit a casual weeknight or a big holiday feast, and it never fails to bring smiles to the table.
Variations
I love how easy it is to customize this Apple Slab Pie Recipe to fit different tastes or dietary needs. For example, if you want to switch up the apples, you can totally use Fuji or Pink Lady apples for a sweeter pie, or add some tart cranberries for a pop of color and tang. It keeps things fresh when you’re making it multiple times in the season.
If you’re baking for a gluten-free household, I’ve had great success using a gluten-free all-purpose flour blend in the crust—just be sure to add a little extra chilling time for the dough. For a vegan version, swap out the butter for a plant-based butter and brush the crust with almond milk or aquafaba instead of egg for that golden finish. It’s a bit of an experiment but totally doable and delicious!
Another variation I enjoy is adding chopped toasted pecans or walnuts into the filling for some crunch. You could also drizzle caramel sauce over the top just before serving for a decadent touch. For a more rustic approach, try baking the slab pie in a cast-iron pan instead of a sheet pan; it creates a lovely, thick crust around the edges and adds some extra depth of flavor.
Storage and Reheating
Storing Leftovers
I always keep leftover Apple Slab Pie in an airtight container in the refrigerator. You can also cover the pie tightly with plastic wrap and then foil to ensure it stays moist but won’t pick up other fridge smells. Leftovers will keep well for up to 4 days, and I recommend eating them within that time for the best texture and flavor.
Freezing
This pie freezes beautifully, which is a lifesaver if you want to prepare ahead. Wrap the cooled pie tightly in plastic wrap and then in foil to prevent freezer burn. It will keep for up to 3 months frozen. When you want to enjoy it, thaw it overnight in the refrigerator before reheating.
Reheating
For reheating, I prefer the oven method because it preserves the flaky crust. Place the thawed slice or whole pie on a baking sheet and warm at 350°F for about 15-20 minutes until heated through. Avoid microwaving if you can—it tends to make the crust soggy and the filling rubbery. If you want to freshen the top crust, you can brush it with a bit of butter before warming for an extra golden touch.
FAQs
Can I use other types of apples for this Apple Slab Pie Recipe?
Absolutely! While Granny Smith and Honeycrisp give a great balance of tart and sweet, you can substitute other varieties like Fuji, Pink Lady, or Gala. Just keep in mind that sweeter apples will make the pie more sugary, so you might want to adjust the sugar in the filling accordingly.
What if I don’t have a lattice cutter or want a simpler top crust?
No worries at all! You can simply roll out the top crust and place it fully over the filling. Just make sure to cut a few slits or small vents to let steam escape during baking. A fully covered crust is classic and delicious on its own, and it’s easier when you’re short on time.
Why do I need to cook the apple filling before baking?
Cooking the apples first softens them gently and reduces excess moisture, which helps prevent a soggy crust. It also allows the flavors—like cinnamon and vanilla—to really develop before baking. This extra step might seem like extra work, but it makes a huge difference in the final texture and taste.
Can I make the dough and filling ahead of time?
Yes! The pie dough can be refrigerated for up to 2 days, and the cooked filling can be made 1-2 days in advance as well. This makes the assembly day much quicker and less stressful. Just be sure to keep both wrapped tightly and chilled until you’re ready to assemble.
What’s the best way to cut and serve the slab pie?
I find using a sharp, serrated knife yields clean slices. Since it’s a large rectangular pie, cutting into approximately 18 squares gives nicely portioned servings. Serve slices on dessert plates with a scoop of ice cream or whipped cream for an inviting presentation.
Conclusion
I can’t recommend this Apple Slab Pie Recipe enough if you want a homemade dessert that’s comforting, impressive, and truly crowd-pleasing. It’s one of those recipes I turn to whenever I want to share something special, and it never disappoints. Trust me, once you make it, you’ll be hooked on that flaky crust and the perfect apple filling combo. So go ahead, gather your ingredients, and treat yourself and your loved ones to a slice of deliciousness.
Print
Apple Slab Pie Recipe
This Apple Slab Pie takes the classic flavors of apple pie and transforms them into a large, easy-to-serve dessert perfect for gatherings. Made with a buttery homemade crust and a spiced filling of Granny Smith and Honeycrisp apples cooked to tender perfection on the stovetop before baking, this slab pie is a crowd-pleaser that delivers the comforting taste of traditional apple pie in a generous rectangular format.
- Total Time: 4 hours 30 minutes
- Yield: 18 slices
Ingredients
Crust
- 3 3/4 cups all-purpose flour (488g)
- 1 1/2 teaspoons salt
- 1 1/2 cups cold unsalted butter, cut into 1/2-inch cubes (336g)
- 4–6 tablespoons very cold water
Apple Filling
- 2 1/2 pounds Granny Smith apples, before peeling and coring (5–6 large apples)
- 2 1/2 pounds Honeycrisp apples, before peeling and coring (4–5 large apples)
- 1 tablespoon lemon juice
- 1/2 cup packed light brown sugar (112g)
- 1/2 cup sugar (104g)
- 1/3 cup all-purpose flour (43g)
- 1/2 teaspoon salt
- 1 1/2 teaspoons ground cinnamon
- 1/4 teaspoon ground nutmeg
- 1 teaspoon vanilla extract
- 1 large egg, beaten
- Coarse sugar, optional
Instructions
- Make the crust: In a large bowl, combine flour and salt. Scatter cubed butter over the flour and work it in with a pastry cutter or fork until pea-sized pieces remain. Add 4 tablespoons of very cold water, gently folding with a rubber spatula to form clusters. Add more water as needed until the dough holds together. Shape into a ball, divide into two discs, wrap in plastic, and refrigerate for at least an hour or up to two days. If refrigerated overnight, let rest at room temperature for an hour before rolling.
- Prepare the apple filling: Peel, core, and slice all apples uniformly about 1/8 inch thick. Toss the slices with lemon juice in a large bowl. Add sugars, flour, salt, cinnamon, and nutmeg; gently toss to coat without breaking slices. Pour into a large 5-quart skillet, cover, and cook over medium heat for about 20 minutes until the apples are fork-tender but still hold shape. Remove from heat and stir in vanilla extract.
- Cool the filling: Spread the cooked apple mixture evenly onto a sheet pan with sides and refrigerate until fully cooled, about 2 hours, or freeze briefly to speed cooling without freezing solid. Use immediately or store in refrigerator up to 2 days.
- Roll out the crust: On parchment paper, roll one dough disc into a rectangle large enough to fit a 10×15-inch pan with extra for shaping. Use the parchment to transfer dough into the pan and shape the edges.
- Assemble the pie: Add the cooled apple filling evenly on the crust. Roll out the second dough disc and place over the filling. Create a lattice top or cover fully, making sure to score the crust for steam vents. Fold and crimp edges as desired.
- Prepare for baking: Brush the pie surface with beaten egg and sprinkle with coarse sugar if desired. Chill in the fridge or freezer for 20-30 minutes to firm the crust.
- Bake the pie: Preheat oven to 425°F (218°C) and place a large baking sheet inside to heat. Place the pie on the hot baking sheet and bake for 15 minutes until crust starts to brown. Then, reduce oven temperature to 350°F (177°C) and bake an additional 25-35 minutes until crust is golden and filling bubbles. Tent with foil if crust browns too quickly, ensuring vents remain for steam release.
- Cool and serve: Let the pie cool on a wire rack at room temperature for 1-2 hours to allow filling to thicken. Slice and serve once cooled to prevent juices from pooling.
Notes
- The apples are pre-cooked on the stovetop to ensure a tender filling that holds shape during baking.
- Use a combination of tart Granny Smith and sweet Honeycrisp apples for balanced flavor.
- Chilling the pie before baking prevents the crust from shrinking and helps it maintain shape.
- Scoring or lattice top is important to allow steam to escape during baking.
- Store any leftovers covered in the refrigerator and consume within 3-4 days.
- Prep Time: 1 hour 30 minutes
- Cook Time: 40 minutes
- Category: Dessert
- Method: Baking
- Cuisine: American
- Diet: Vegetarian

