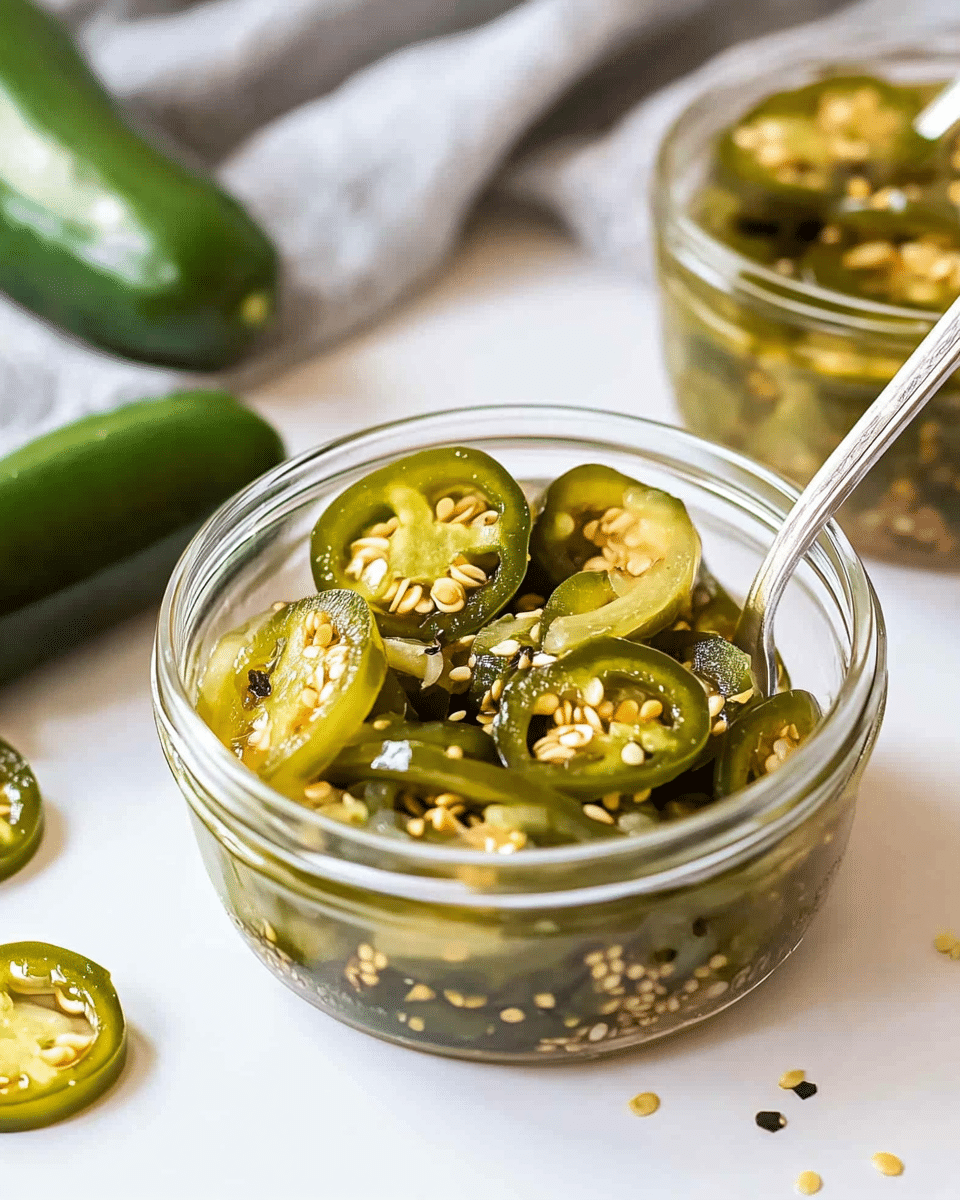
These Bread and Butter Jalapeño Pickles are a delicious twist on the classic bread-and-butter pickle, with a spicy kick from fresh jalapeños. The perfect balance of sweet, tangy, and spicy, these pickles are irresistibly crunchy and make a great snack or topping for sandwiches, burgers, or tacos. Easy to make and perfect for pickle lovers, these pickles offer bold flavors with just the right amount of heat!
Why You’ll Love This Recipe
Bread and Butter Jalapeño Pickles combine all the best flavors of classic pickles, with the added heat of fresh jalapeños. The sweet and tangy brine, spiced with mustard seeds, celery seeds, and turmeric, complements the heat from the jalapeños perfectly. These pickles are crunchy, flavorful, and versatile—add them to sandwiches, serve them as an appetizer, or just snack on them straight from the jar. With minimal prep and a simple brining process, they’re an easy and rewarding way to elevate your pickle game.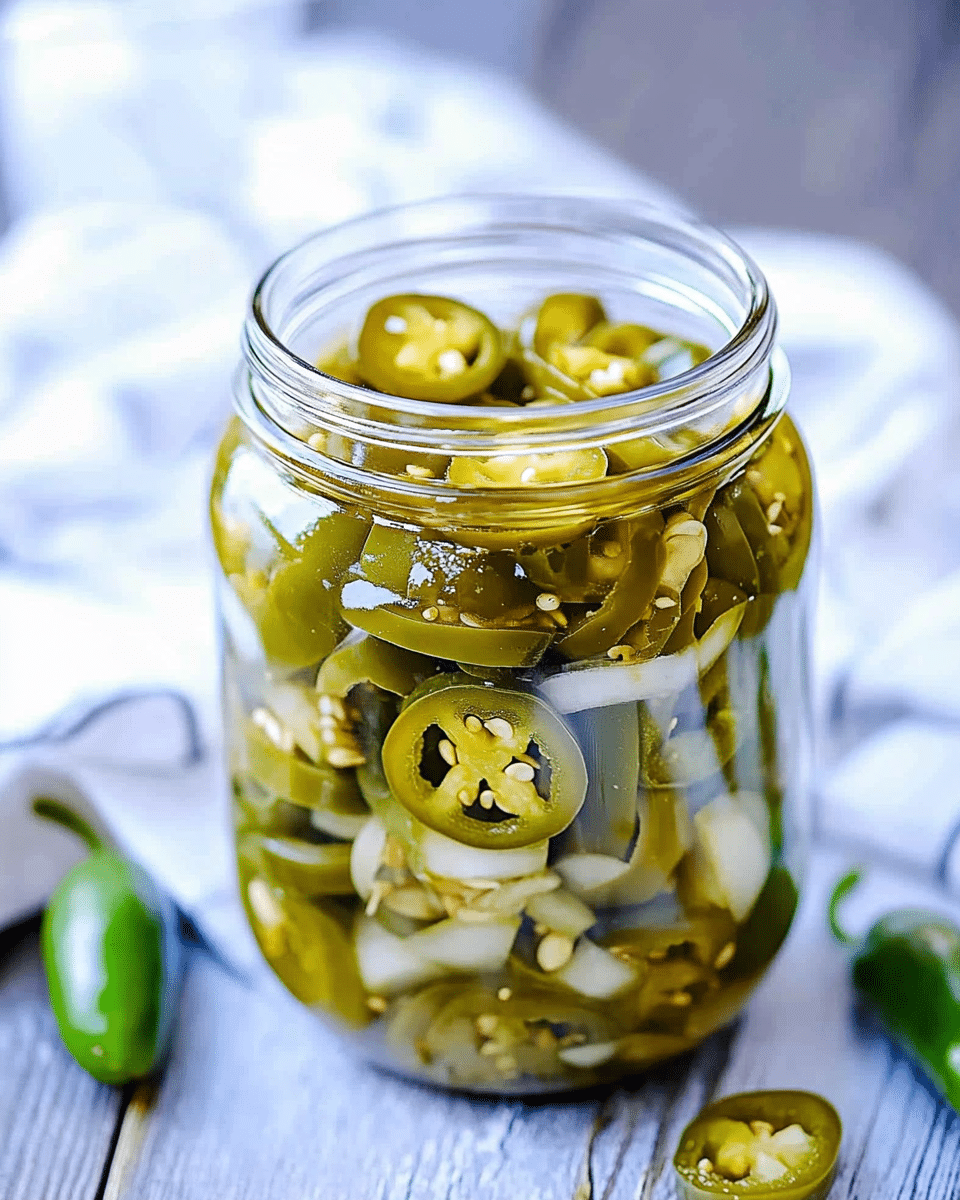
Ingredients
For approximately 4 pints of pickles:
-
2 lbs fresh jalapeños, sliced into rounds
-
1 large sweet onion, thinly sliced
-
2 cups white vinegar (5% acidity)
-
1 ½ cups granulated sugar
-
1 tablespoon mustard seeds
-
1 tablespoon celery seeds
-
2 teaspoons ground turmeric
-
1 teaspoon ground cloves (optional)
-
1 tablespoon kosher salt
-
½ teaspoon red pepper flakes (optional for extra heat)
(Tip: You’ll find the full list of ingredients and measurements in the recipe card below.)
Directions
Sterilize the Jars:
-
Wash the jars, lids, and rings in hot, soapy water. Sterilize the jars by boiling them for 10 minutes or running them through a hot dishwasher cycle. Keep the lids and rings warm in simmering water while you prepare the pickles.
Prepare the Jalapeños and Onions:
-
Put on gloves to handle the jalapeños (this helps avoid irritation). Slice the jalapeños into even rounds and the sweet onion into thin half-moons.
Make the Brine:
-
In a non-reactive saucepan, combine the white vinegar, sugar, mustard seeds, celery seeds, turmeric, ground cloves (optional), kosher salt, and red pepper flakes (optional). Heat gently while stirring until the sugar dissolves and the brine just comes to a boil. Remove from heat.
Pack the Jars:
-
Pack the sliced jalapeños and onions tightly into the sterilized jars. You can use a spoon to push them down gently, making sure there’s enough room for the brine to cover the vegetables.
Add the Brine:
-
Use a ladle and funnel to pour the hot brine into the jars, ensuring the vegetables are completely covered, leaving about ½ inch of headspace at the top of each jar.
Seal the Jars:
-
Wipe the rims of the jars clean with a damp cloth. Place the lids on and secure with the rings until they are fingertip-tight.
Process the Jars (Optional for Long-Term Storage):
-
For shelf-stable pickles, process the jars in a boiling water bath for 10 minutes. After processing, let the jars cool undisturbed for 12-24 hours. Check that the lids have sealed by pressing the center of each lid. If it doesn’t pop back, the jar has sealed properly.
Cure and Store:
-
Allow the pickles to cure for at least two weeks to develop full flavor. Store unopened jars in a cool, dark place. After opening, refrigerate and consume within two months.
Serve:
-
Enjoy the pickles straight from the jar, or serve them alongside your favorite dishes like sandwiches, tacos, or burgers.
Servings and Timing
-
Servings: 4-6 servings
-
Prep Time: 15 minutes
-
Cook Time: 15 minutes
-
Total Time: 30 minutes (plus curing time)
Variations
-
Extra Heat: Add more red pepper flakes or additional jalapeños for a spicier kick.
-
Spicy Vinegar Kick: Replace part of the white vinegar with apple cider vinegar for a tangier, more complex flavor.
-
Garlic Addition: Add a couple of smashed garlic cloves to the jars for a savory twist.
-
No Cooking Option: If you prefer a raw pickle, simply mix the ingredients, pour over the vegetables, and refrigerate. These will need at least 3-4 days to develop flavor.
Storage/Reheating
-
Storage: Store the pickles in an airtight container in a cool, dark place for up to 6 months if processed in a water bath. After opening, keep them in the refrigerator and consume within two months.
-
Refrigeration: If you’re not canning, refrigerate the pickles immediately and let them cure for 3-4 days before enjoying.
FAQs
How long do these pickles need to sit before they’re ready to eat?
While they can be enjoyed immediately, these pickles taste best after about two weeks of curing, allowing the flavors to meld together.
Can I use other types of peppers for this recipe?
Yes! You can substitute the jalapeños with other peppers like serrano or banana peppers for a different flavor or heat level.
Can I make these pickles without using a water bath?
If you’re planning to eat the pickles quickly, you can skip the water bath and refrigerate them right after sealing. They will need at least 3-4 days in the fridge to fully develop flavor.
Can I make these pickles with sweet peppers instead of jalapeños?
Yes! Sweet peppers will give a much milder flavor, so if you want the heat of the jalapeños, you can combine sweet peppers with a few hot peppers.
How do I know when the jars have sealed properly?
When the jars are sealed properly, the lids will be concave (curved inward), and pressing the center of the lid won’t cause it to pop back up. If any jars haven’t sealed, store them in the fridge and consume them within a few days.
Can I use a different type of vinegar?
Yes, you can substitute white vinegar with apple cider vinegar or rice vinegar for a different flavor. Just make sure the vinegar is at least 5% acidity to ensure proper preservation.
Conclusion
These Bread and Butter Jalapeño Pickles are the perfect blend of sweet, tangy, and spicy, making them a must-try for any pickle lover. The combination of the crunchy vegetables, flavorful brine, and optional heat from the jalapeños offers an irresistible treat. Easy to make and store, these pickles are perfect for adding extra flavor to your meals or enjoying as a snack on their own.
Print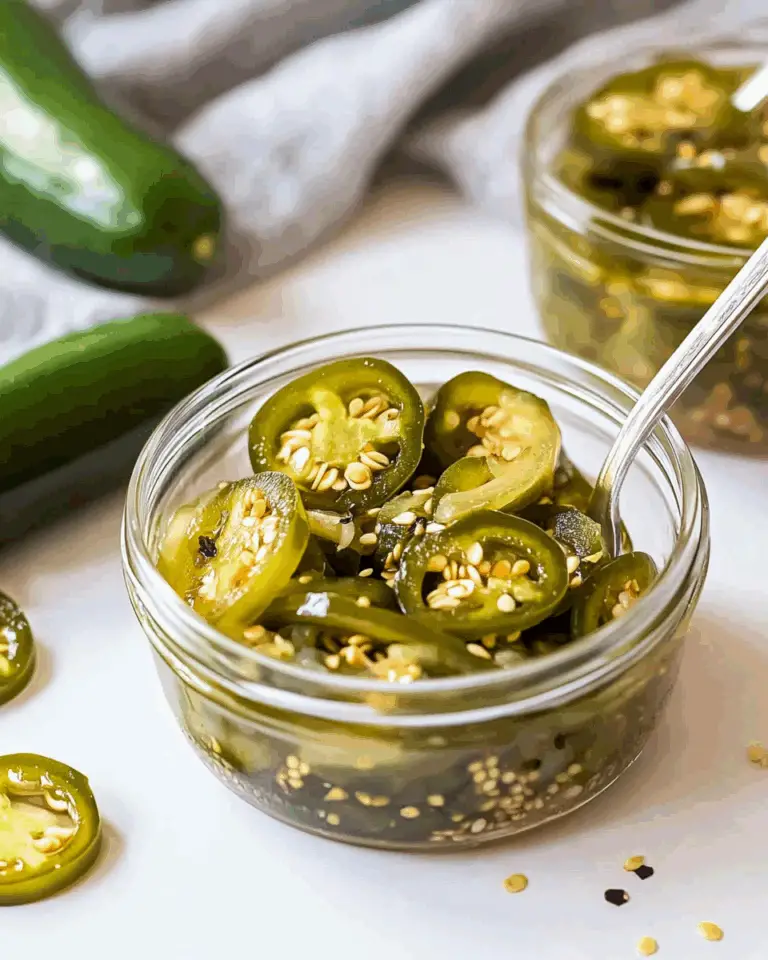
Bread and Butter Jalapeño Pickles
These Bread and Butter Jalapeño Pickles combine the classic sweet and tangy flavors of traditional bread and butter pickles with the bold, spicy kick of fresh jalapeños. Perfect for pickle lovers, they’re sweet, spicy, and irresistibly crunchy—an easy way to add a flavorful punch to your meals!
- Total Time: 30 minutes
- Yield: 4-6 servings
Ingredients
- For approximately 4 pints of pickles:
- 2 lbs fresh jalapeños, sliced into rounds
- 1 large sweet onion, thinly sliced
- 2 cups white vinegar (5% acidity)
- 1 ½ cups granulated sugar
- 1 tablespoon mustard seeds
- 1 tablespoon celery seeds
- 2 teaspoons ground turmeric
- 1 teaspoon ground cloves (optional)
- 1 tablespoon kosher salt
- ½ teaspoon red pepper flakes (optional, for extra heat)
Instructions
- Sterilize the Jars: Wash the jars, lids, and rings in hot, soapy water. Sterilize the jars by boiling them for 10 minutes or running them through a hot dishwasher cycle. Keep the lids and rings warm in simmering water.
- Prepare the Jalapeños and Onions: Put on gloves to avoid irritation. Slice the jalapeños into even rounds and the sweet onion into thin half-moons.
- Make the Brine: In a non-reactive saucepan, combine the vinegar, sugar, mustard seeds, celery seeds, turmeric, ground cloves (if using), kosher salt, and red pepper flakes (if using). Heat the mixture gently while stirring until the sugar dissolves and the brine just comes to a boil. Remove from heat.
- Pack the Jars: Pack the sliced jalapeños and onions tightly into the sterilized jars, leaving enough room for the brine to cover the vegetables.
- Add the Brine: Use a ladle and funnel to pour the hot brine into the jars, covering the vegetables and leaving ½ inch of headspace at the top of the jar.
- Seal the Jars: Wipe the rims of the jars clean to ensure a good seal. Place the lids on and secure with rings until they are fingertip-tight.
- Process the Jars (Optional for Long-Term Storage): For shelf-stable pickles, process the jars in a boiling water bath for 10 minutes. After processing, let the jars cool undisturbed for 12-24 hours. Check to ensure the lids have sealed by pressing in the center—if it doesn’t pop back, the jar is sealed.
- Cure and Store: Allow the pickles to cure for at least two weeks for full flavor development. Store unopened jars in a cool, dark place. After opening, refrigerate and consume within two months.
Notes
- The pickles get better over time, so give them at least two weeks to fully develop their flavor.
- You can adjust the heat level by adding or removing the red pepper flakes based on your preference.
- For an extra kick, try adding a few sliced garlic cloves to the jars before adding the brine.
- Prep Time: 15 minutes
- Cook Time: 15 minutes
- Category: Snack / Condiment
- Method: Canning
- Cuisine: American (Pickling)
- Diet: Vegan
Nutrition
- Serving Size: 1 serving
- Calories: 60 kcal
- Sugar: 12g
- Sodium: 560mg
- Fat: 0g
- Saturated Fat: 0g
- Unsaturated Fat: 0g
- Trans Fat: 0g
- Carbohydrates: 15g
- Fiber: 2g
- Protein: 1g
- Cholesterol: 0mg

