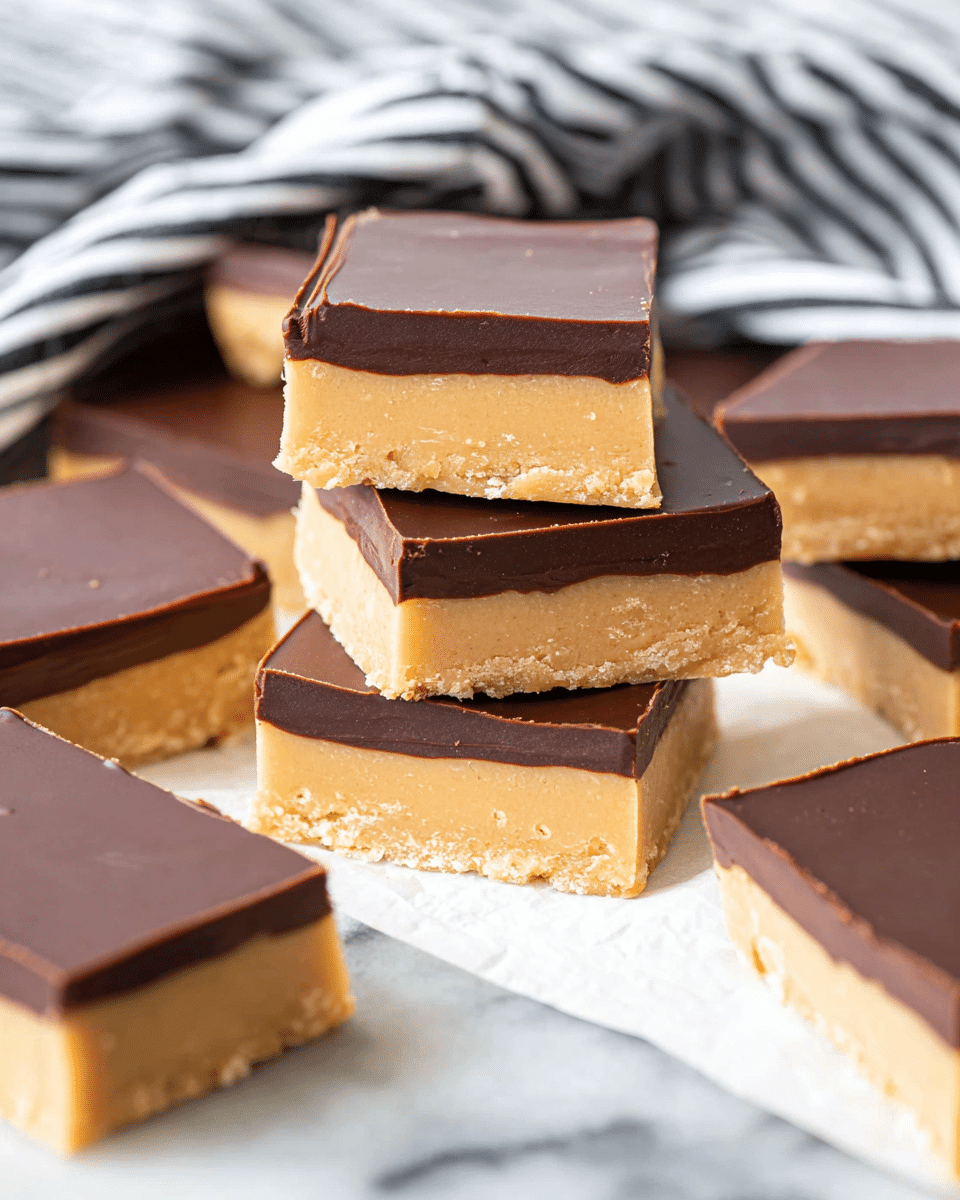
I absolutely adore this No-Bake Chocolate Peanut Butter Bars Recipe because it satisfies my sweet tooth with the perfect blend of rich chocolate and creamy peanut butter without ever turning on the oven. Whenever I want a quick, melt-in-your-mouth treat that feels indulgent yet homemade, these bars are my go-to. They’re incredibly simple to make, yet they taste like something from a fancy candy shop. Trust me, once you try this recipe, you’ll always have a new favorite in your dessert lineup.
Why You’ll Love This No-Bake Chocolate Peanut Butter Bars Recipe
What really hooks me about this recipe is the flavor combination. The creamy peanut butter layer is perfectly balanced with a sweet, buttery base and topped with a glossy layer of smooth semisweet chocolate. Every bite melts in your mouth, and somehow it manages to be rich without feeling heavy. It’s the kind of dessert that makes you want to close your eyes and savor the moment, and I find myself sneaking pieces whenever I pass by the kitchen.
Besides the taste, the ease of preparation is unbeatable. I love any recipe that lets me whip up something delicious without heating up the whole house or messing with complicated steps. You simply mix, press, melt chocolate, and spread. No baking means less stress and more time to enjoy the process (and the result). Plus, these bars are perfect for practically any occasion—whether it’s a casual family get-together, a holiday party, or a sweet snack after a busy day, they always impress without any fuss.
Ingredients You’ll Need
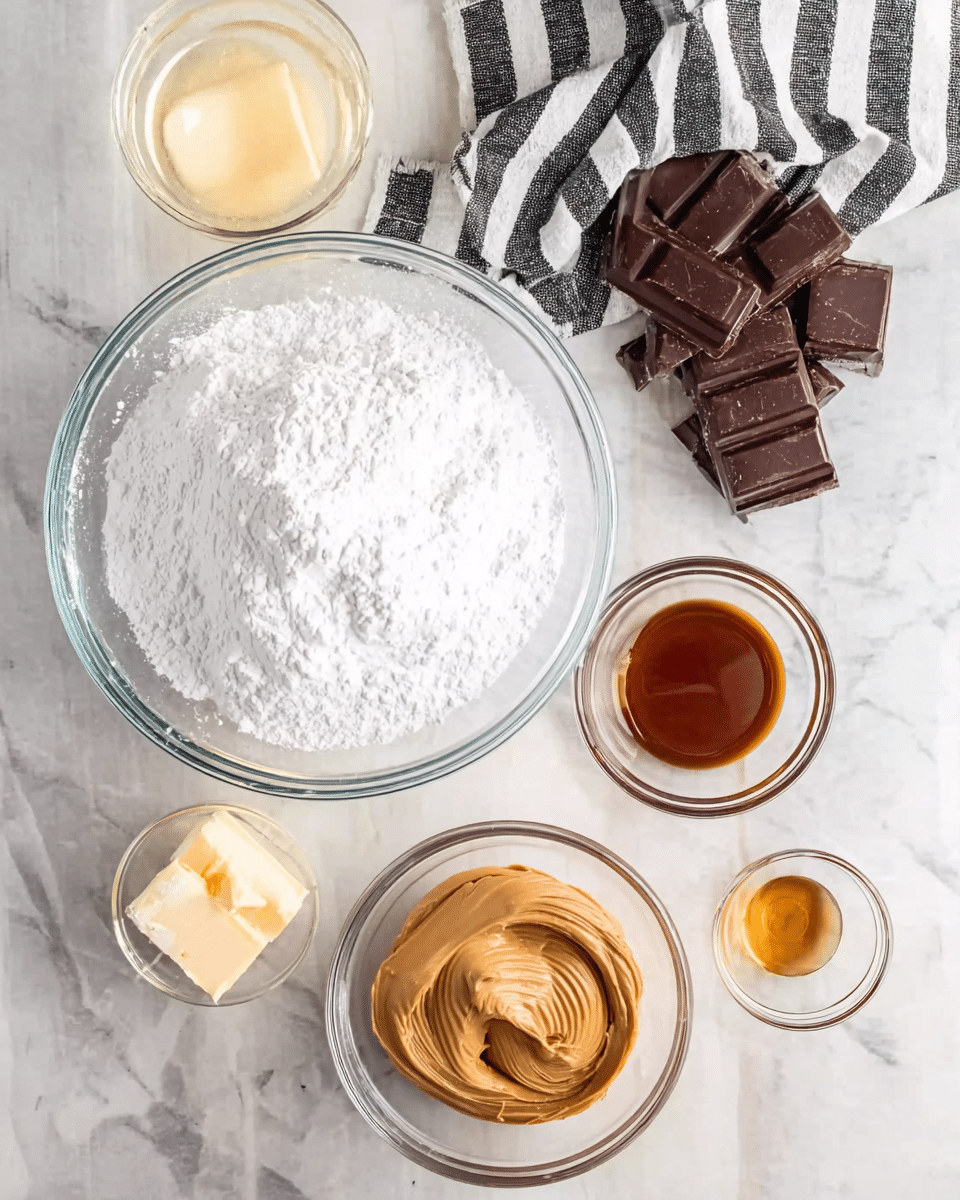
The ingredients for this recipe are wonderfully simple and each one plays an important role in creating that perfect texture and flavor. From the silky peanut butter to the rich chocolate topping, every component is essential and easy to find.
- ¾ cup unsalted butter, melted: This adds necessary richness and helps bind the base layer together smoothly.
- 3 ½ cups powdered sugar: It sweetens the bars perfectly while contributing to that signature fudgy texture.
- 1 ½ cups creamy peanut butter: Use creamy for that smooth consistency that melts in your mouth beautifully.
- 1 teaspoon pure vanilla extract: A small but powerful addition that elevates all the flavors.
- 4 bars Ghirardelli semisweet chocolate (4 ounces each): High-quality chocolate makes all the difference for the topping’s shine and flavor.
- 1 tablespoon butter: Mixed with the chocolate to create a silky, glossy finish.
Directions
Step 1: Line a 13×9 inch baking sheet with foil and set it aside. This makes removing the bars effortless once they’ve set.
Step 2: In a large mixing bowl, combine the melted butter, powdered sugar, creamy peanut butter, and vanilla extract. Beat everything together until it forms a thick, dough-like mixture that you can press into place. I like to use my hands for this part to really get it evenly spread.
Step 3: Press the peanut butter mixture firmly and evenly into the bottom of the foil-lined baking sheet. Make sure it’s packed tightly so the bars hold their shape nicely after chilling.
Step 4: Break the chocolate bars into pieces and place them in a microwave-safe bowl. Add the tablespoon of butter, then microwave in 30-second intervals, stirring well between each until the chocolate is completely melted and smooth. This usually takes about 1 ½ minutes total.
Step 5: Pour the melted chocolate over the peanut butter base and spread it evenly with a spatula. The chocolate should form a nice, glossy layer on top.
Step 6: Allow the bars to cool at room temperature until the chocolate has fully set, which usually takes around 30 minutes. For quicker results, you can pop the dish into the fridge.
Step 7: Once the chocolate layer is firm, lift the foil out of the pan and cut into small, bite-sized squares. Enjoy immediately or store as desired.
Servings and Timing
This recipe yields about 64 bite-sized bars, making it perfect for large gatherings or to keep plenty on hand for snacking. The prep time is approximately 15 minutes since there’s no baking involved, and the additional time for the chocolate to set is about 30 minutes. Overall, you’re looking at a total time of around 45 minutes to get these bars from start to finish, which is fantastic for such a decadent treat.
How to Serve This No-Bake Chocolate Peanut Butter Bars Recipe
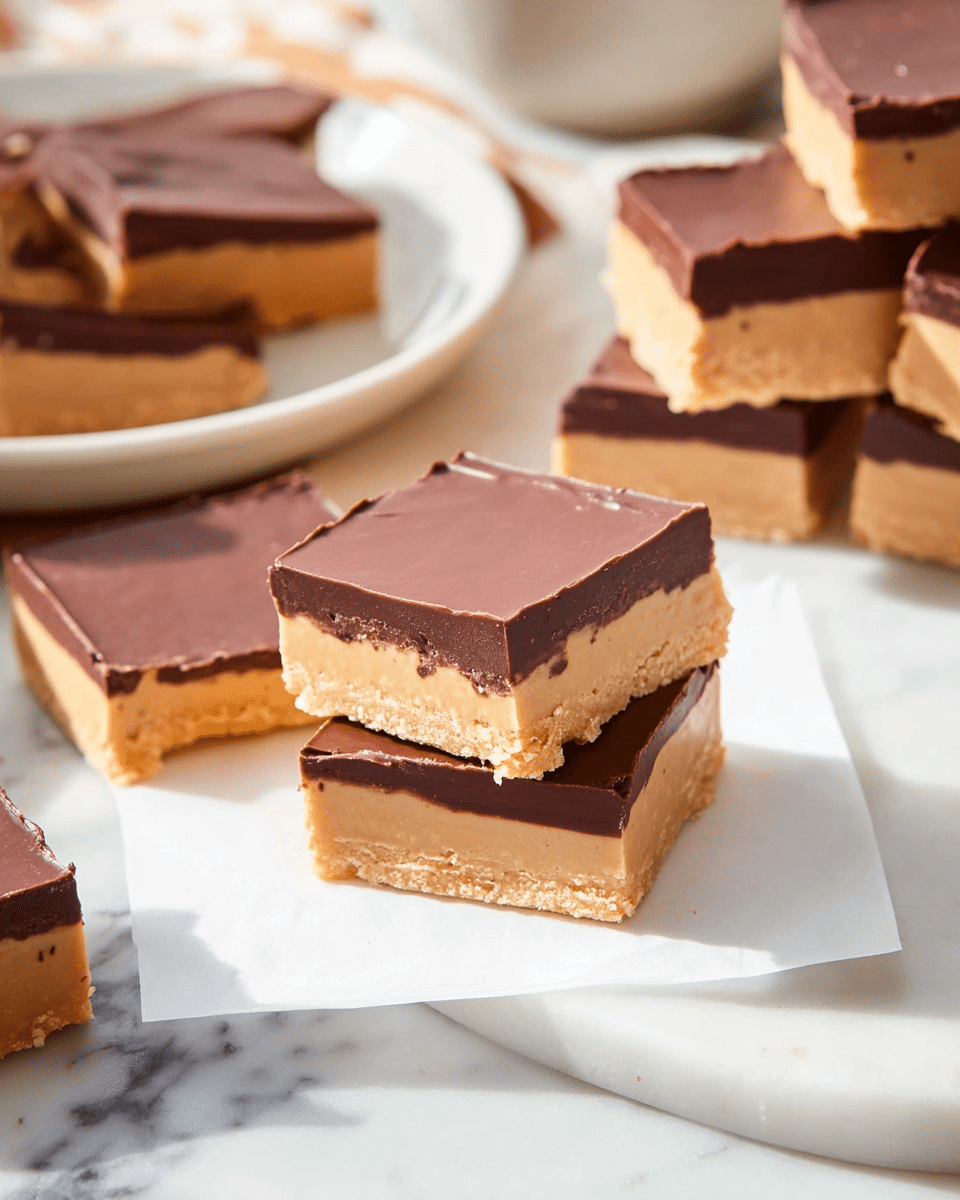
When I serve these bars, I often like to do so at room temperature because you get that perfect balance of creamy peanut butter and firm chocolate without the bars being too hard or cold. They’re excellent as little party bites or as treats to accompany an afternoon cup of coffee or tea. I sometimes garnish finished bars with a sprinkle of flaky sea salt or crushed peanuts on top to add texture and a hint of savory contrast—instantly making them look more gourmet.
If I’m serving a dessert platter, I pair these bars with fresh berries or a simple fruit salad to lighten the richness. For a fun adult twist, I love serving them alongside a glass of chilled milk or even a peanut-butter-flavored cocktail. They also work beautifully for holiday celebrations or potlucks since you can make a big batch ahead and transport them easily by keeping them in an airtight container.
For portioning, I cut the bars into small squares—about one to two inches wide—so they’re bite-sized and perfect for sampling. This way, everyone can enjoy a few without feeling overwhelmed by something too sweet or heavy. Presentation-wise, I sometimes place the squares neatly on a decorative plate or tiered tray for a polished look that’s sure to wow guests.
Variations
I love experimenting with variations of this No-Bake Chocolate Peanut Butter Bars Recipe. If you want to switch things up, try substituting creamy peanut butter with natural almond butter or cashew butter for a different nutty flavor. You could even mix in some chopped nuts or mini chocolate chips into the peanut butter base for extra texture and surprises in every bite.
If you’re catering to dietary needs, this recipe can be easily modified. For a gluten-free version, just be sure your powdered sugar and chocolate bars are certified gluten-free. Vegan adaptations are possible by using dairy-free butter and dairy-free chocolate, along with a plant-based peanut butter. I’ve tried these versions and still loved the end result—just a slightly different mouthfeel but equally delicious.
Flavor-wise, adding a pinch of cinnamon or a drop of espresso powder to the peanut butter mixture elevates the chocolate flavor deliciously. For a fun twist, you can also swap the semisweet chocolate topping with white chocolate or add a swirl of caramel for an ultra-luxe bar. The no-bake nature of this recipe means you can get creative without worrying about oven times or temperature adjustments.
Storage and Reheating
Storing Leftovers
I always keep leftover bars in an airtight container at room temperature, which keeps them fresh and the chocolate shiny for up to a week. If your kitchen is warm, storing them in the fridge is a good idea to prevent melting, but just remember the chocolate will harden and the bars will be firmer here.
Freezing
This recipe freezes exceptionally well, which is great if you want to prepare these bars ahead of time. I wrap them tightly in foil or plastic wrap and place them in a freezer-safe container. They keep beautifully for up to 3 months. When you’re ready to enjoy, just thaw them overnight in the fridge or let them sit at room temperature for about 30 minutes.
Reheating
Since these are no-bake bars, reheating isn’t necessary, but if you prefer a softer texture, I recommend letting them come to room temperature rather than microwaving. The microwave can cause the chocolate to bloom or get greasy, which changes the texture. Warming gently and slowly is the key to enjoying them at their best.
FAQs
Can I use crunchy peanut butter instead of creamy?
Absolutely! Using crunchy peanut butter will give your bars a bit more texture and a nutty crunch in every bite. Just keep in mind that the bars might be a little less smooth, but still delicious.
What type of chocolate is best for the topping?
I recommend semisweet chocolate bars for a perfect balance of sweetness and richness, like Ghirardelli. You can also use chocolate chips or dairy-free chocolate if you prefer, but bars tend to melt more smoothly.
Can I make these bars ahead of time for a party?
Yes! These bars are great make-ahead treats. You can prepare them up to 2 days in advance and store them in an airtight container at room temperature or refrigerated if your home is warm.
Are these bars gluten-free?
They can be gluten-free as long as you use gluten-free powdered sugar and chocolate. Always check your ingredient labels to be sure. The recipe itself doesn’t include any wheat-based ingredients.
How do I prevent the chocolate from cracking when cutting the bars?
Make sure the chocolate is fully set and the bars are completely cool before cutting. Using a sharp knife warmed by running it under hot water and then dried helps achieve clean cuts without cracking.
Conclusion
I genuinely hope you give this No-Bake Chocolate Peanut Butter Bars Recipe a try soon because it’s one of those rare, simple treats that never fails to impress. Whether you need a quick snack, a crowd-pleasing dessert, or just a little pick-me-up, these bars deliver every time with ease and incredible flavor. Making and sharing this recipe always brings me joy, and I’m sure it will become a favorite for you too. Enjoy every luscious bite!
Print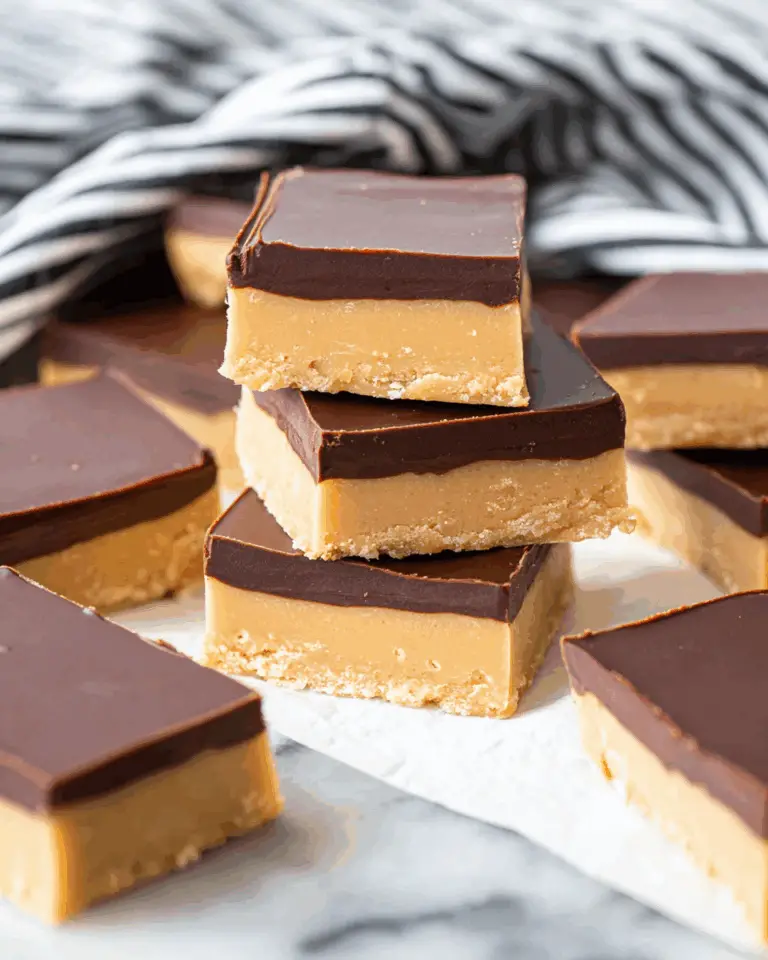
No-Bake Chocolate Peanut Butter Bars Recipe
These no-bake Peanut Butter Bars, also known as Buckeye Bars, combine the rich creaminess of peanut butter with a smooth chocolate topping to create a decadent treat that melts in your mouth. Quick to prepare and perfect for satisfying chocolate and peanut butter cravings, these bars require no oven and set beautifully with a simple chilling step.
- Total Time: 45 minutes
- Yield: 64 servings
Ingredients
Peanut Butter Layer
- ¾ cup unsalted butter, melted
- 3 ½ cups powdered sugar
- 1 ½ cups creamy peanut butter
- 1 teaspoon pure vanilla extract
Chocolate Topping
- 4 bars Ghirardelli semisweet chocolate (4 ounces each), broken into pieces
- 1 tablespoon unsalted butter
Instructions
- Prepare Baking Dish: Line a 13×9 inch baking sheet with foil and set aside for easy removal of bars later.
- Make Peanut Butter Dough: In a large mixing bowl, combine the melted butter, powdered sugar, creamy peanut butter, and vanilla extract. Beat the mixture until it forms a thick dough-like consistency. Using your hands, press this dough evenly into the bottom of the prepared baking dish.
- Melt Chocolate Topping: Place the broken chocolate bars and 1 tablespoon of butter in a microwave-safe bowl. Heat in 30-second intervals, stirring between each, until the chocolate is fully melted and smooth. This usually takes about 1 ½ minutes total.
- Spread Chocolate Layer: Pour the melted chocolate mixture evenly over the peanut butter base, spreading it smoothly to cover the entire surface.
- Set the Bars: Allow the chocolate to set completely at room temperature or place in the refrigerator for faster setting before cutting into squares.
- Store and Serve: Keep the bars in an airtight container at room temperature for up to several days. Enjoy your delicious peanut butter bars!
Notes
- For easier removal, make sure to line the baking dish with foil and leave some overhang.
- You can substitute creamy peanut butter with natural peanut butter, but the texture may be slightly different.
- To speed up the chocolate setting process, refrigerate the bars after spreading the chocolate layer.
- These bars are perfect for parties and can be stored at room temperature without refrigeration for several days.
- Use high-quality chocolate for the best flavor and smooth texture.
- Prep Time: 15 minutes
- Cook Time: 0 minutes
- Category: Dessert
- Method: No-Cook
- Cuisine: American

